Tuesday, March 6, 2012

The Lisette Sew Along - First Cab off the Rank

.

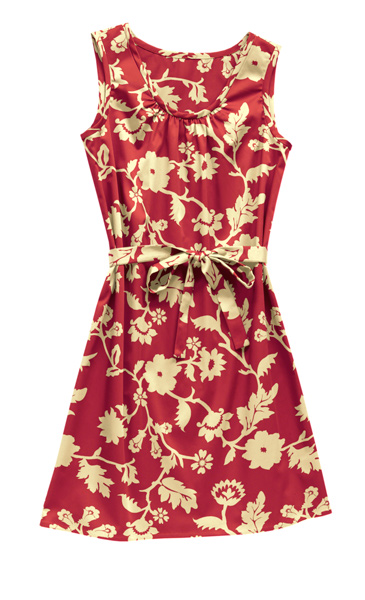
So, while I was sitting at home in my pyjamas on the weekend procrastinating about fabric choices, Beccasauras had already whipped up her gorgeous version of the Lisette Continental Dress!

.

Check out her blog post for her tips about the neckline gathering and the length of the dress.

We have lots of lovely peeps playing along now. It's fun to see WIP photos popping up on Twitter and Instagram. Make sure to search for the #lisettesewalong hashtag to check them out!


Sew-Along Sign Up
Link to Pattern
Sew-Along Flickr Group
Sew Lisette Flickr Group

PS - the 50% off Lisette Patterns sale at Spotty ends on March 11th 

Monday, March 5, 2012

Tutorial - Little Girls Skirt


Download the PDF

You will need:

Fabric
Thread
Sewing Machine
Overlocker (optional)
Wide Elastic
Safety Pin (for threading the elastic)


Step 1. Determine the Size:


I'm choosing to make a size 4 skirt for a friends daughter using the online Childrens Clothing Sizing Guide from the Target Website. It gives me a waist measurement of 54cm.

The length is a little bit of a guesstimate, but I'm aiming for have a finished length of approximately 36cm.

Step 2. Calculate the Fabric Size:


The skirt is just one large rectangle of fabric.

Width: Finished Waist Size x 1.5 = 54 x 1.5 = 81cm
Length: Finished Length + 5 cm = 36 + 5 = 41cm

Step 3. Fabric


Cut the fabric rectangle and overlock all four sides (if you have an overlocker)

Step 4. Hem


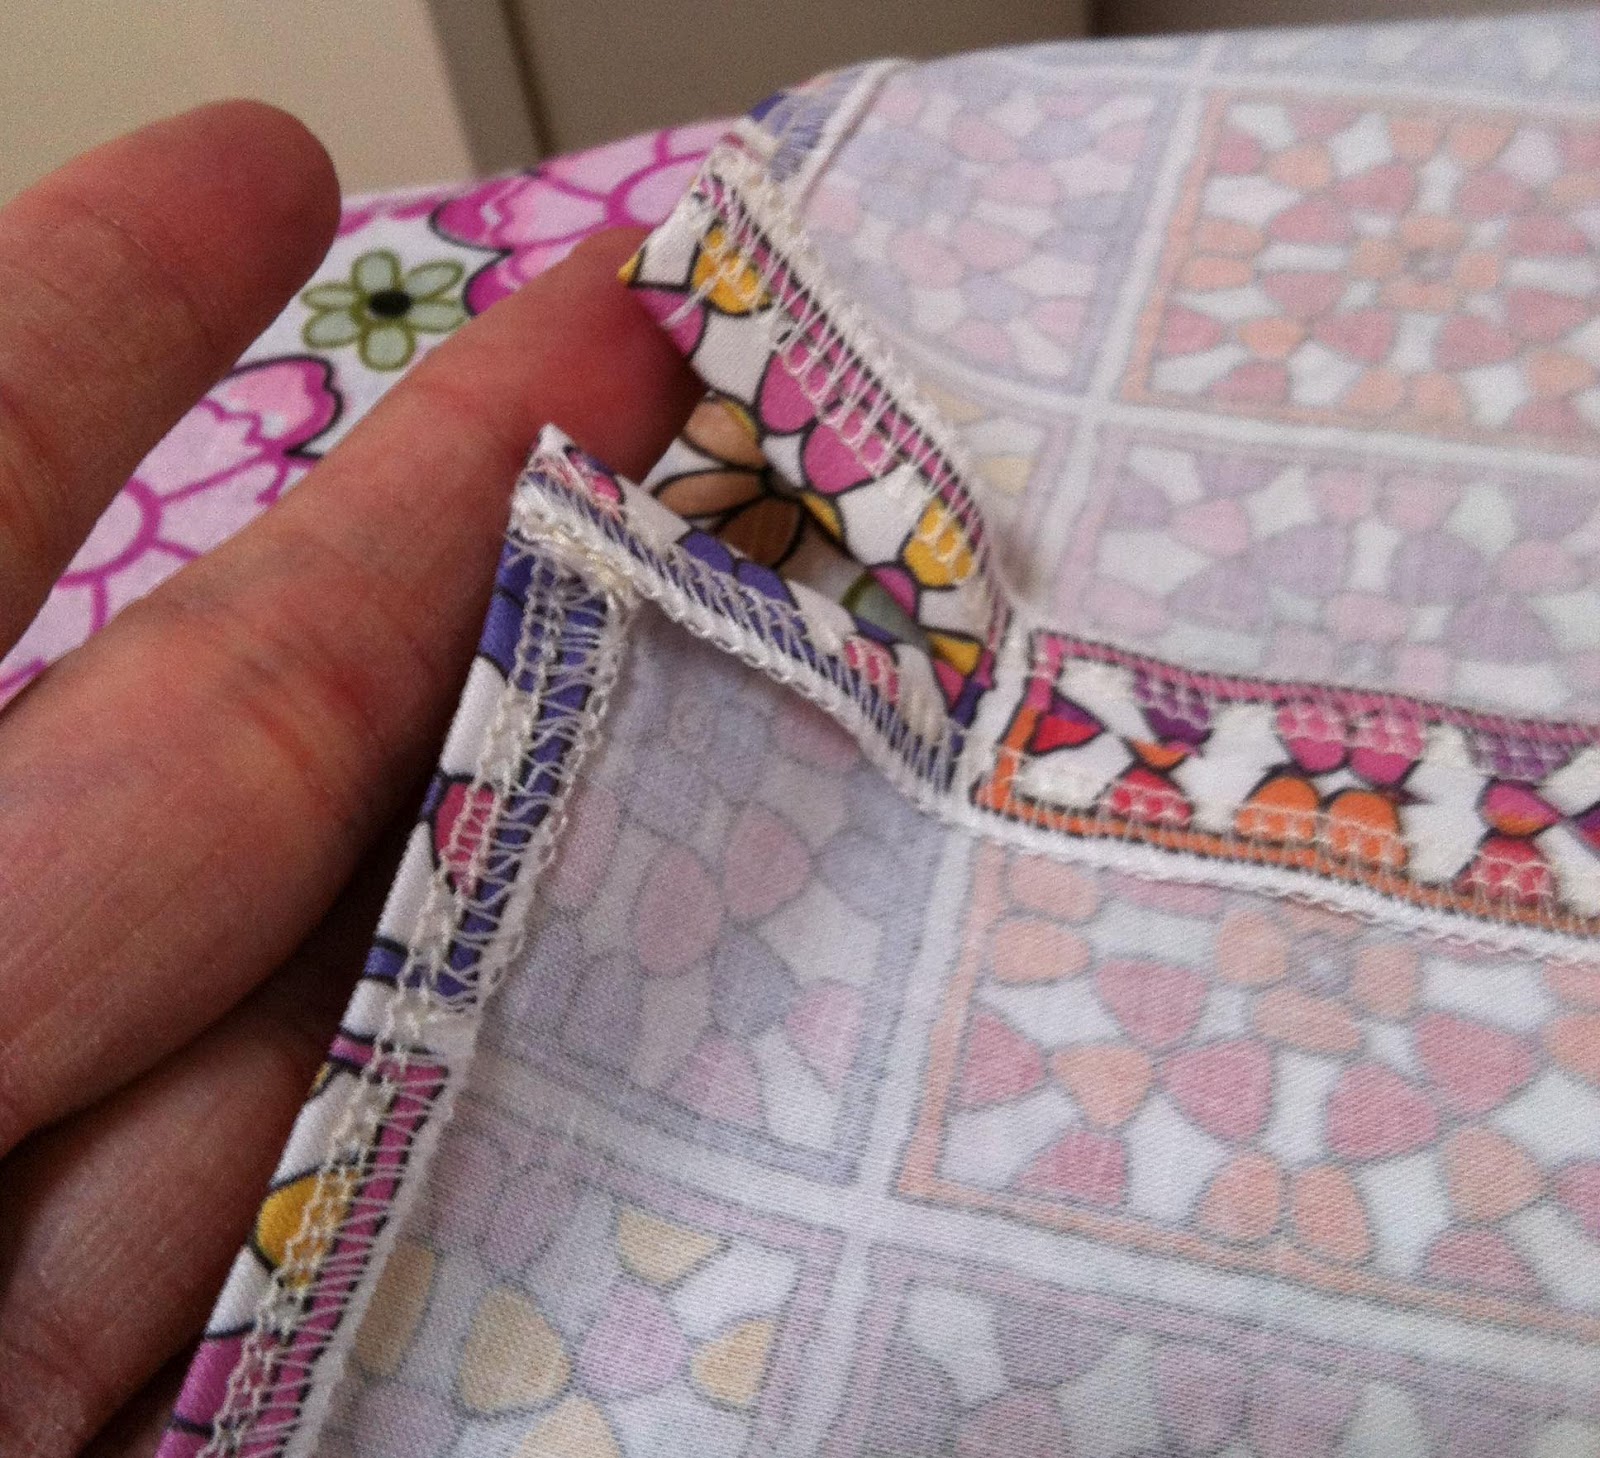
On both of the two long sides of the rectangle, fold over a 1cm hem and iron and stitch into place.

Step 5 - Sew into a cylinder:


Fold your fabric in half with right sides together, so that the two short sides are lined up facing each other.

Measure and mark 3 cm from the top, then sew a 1cm seam all the way to the bottom

You should now have a large fabric cylinder.

Step 6 - Press Seams Open


Place the cylinder shape over your ironing board, and press the seam open.


You should have the 3cm gap at the top of your seam.

Step 7 - Create the casing for the elastic


At the 3cm mark, fold the fabric over and press into place.


Stitch into place along the same stitching line. You can now see the little gap in the inside seam where you can feed the elastic through at the end.


Check the width of your elastic, and then sew another row of stitching along the top edge of the skirt. This ensures that the elastic stays nice and neat and flat inside the casing.

Step 8 - The Elastic


To determine the length of the elastic - just add 4 cm to the waist measurement.
I've cut the elastic at 54 + 4 = 58cm

Attach a safety pin and feed it through the casing until you have both ends out.


Lay the elastic flat with a 2cm overlap and stitch together securely.

Once stitched, feed back into the casing, spreading it evenly around the elastic.

Stitch the gap closed.


Step 9 - Finishing the bottom.


I've chosen to add binding at the bottom of my skirt, but you can just fold and iron a 1cm seam, and stitch it into place, or even add a little ruffle.


That's it!

Super simple and easy peasy.

If you make one, I'd love it if you added it to my tutorials Flickr Group

Sunday, March 4, 2012

Sunday Snippets... via Instagram

A collection of my favourite shots this week...

Sad Face
Nice weather for boots
SuperPops Mail

We couldn't have co-ordinated better if we'd tried!
 Pyjama day and homemade pumpkin soup

Sunday Snippets via Tinniegirl

Saturday, March 3, 2012

The Lisette Sew-Along - Flickr


Look! Our little Sew-Along was re-tweeted by the ACTUAL Sew Lisette....

We currently have ten crafty peeps signed up on the official list, but there are a few more playing along via Twitter and Intstagram too.

If the Lisette pattern doesn't suit your style, the please still join in and just make your favourite dress. It's all about sewing motivation and fun!

I'm planning on going through the stash today to try to find something to use, while B-Fab is off to search her local Spotty for the larger sized pattern that I need.

In the meantime, I've created a Sew-Along Flickr Group so that we can share our photos. Feel free to add photos of your fabric, any work-in-progress shots, and of course, the finished dress.

You can also add photos of your finished dress to the official Sew Lisette Flickr Group.


Sew-Along Sign Up
Link to Pattern
Sew-Along Flickr Group
Sew Lisette Flickr Group

Thursday, March 1, 2012

My Creative Space


It's been a while since I've played along with MCS, but today I actually have something to show.

I'm right in the middle of a new tutorial... and hoping to have it finished over the weekend.

Have a great day!

More Creative Spaces

PS - just a little reminder... if you're joining in with the Lisette Sew Along, please add your blog to the linky list. There are also a couple of crafty peeps joining in as a 'dress' sew along as they are using other patterns, which is fabulous. The more the merrier I say. We can all cheer each other along!

Tuesday, February 28, 2012

A Lisette Continental Dress Sew-Along


I've been searching around for a super simple summer dress pattern for quite a while now, and I think (and hope) that I may have fnally found one.
It's a bit hard to see the dress detail on the pattern envelope, but it has a nice neckline and it should be perfect for my constant weight fluctuations with the tied waist.

For a bit of added motivation, I thought I'd make it a Sew-Along.


In perfect timing, the Lisette Patterns are 50% off for VIP card holders at Spotlight this week (which brings them down to $9), and the fabrics are 20% off.

I'm using fabric from the stash (because seriously, I don't need any more fabric).... but I did pop in to Spotty to buy the pattern, only to find that they didn't have my size.

So while I'm waiting for them to order it in, it gives anyone who would like to play along, the opportunity to find the pattern too.

Just add your name to the list below any time before the end of March.


Feel free to blog your fabric selection and your progress along the way, and we'll all aim to do the big reveal on March 31st.

Monday, February 27, 2012

Sewjo...where for art thou?

I conducted a little totally non-scientific experiment on the weekend to try to pinpoint when my sewjo disappeared.

The carbon dating of my iPhone photos seems to indicate that it was somewhere around  February 3, although I'm quite sure that it was on a go slow for a couple of weeks prior.

With the forced hibernation due to the crazy hot weekend, I decided to set myself a challenge...


.... and thanks to my infatuation with Instagram, this is the finished result.

It took me all weekend in between faffing, drinking cups of tea, catching up on all of my Foxtel IQ'd shows, washing etc...

 Jeez.. there's that moon tan again!

...and thanks to the power of Instagram, when I had a little whine about how frustrating it is to 'turn out' softies,  Berene from Happy Sew Lucky pointed me in the direction of one of her tutorials.

Brilliant!

Now she just needs some clothes.

Sunday, February 26, 2012

Sunday Snippets / Donate Life Week / The Last Race

Fabric designed by Me

And so we've come to the end of another busy week...

Some extra contract admin work came my way, which meant that there was no time for crafting.

Speech Bubble Blackboard by the Blackboard Boy

Even though this blog is a politics free zone, I have to say that I'm really disappointed about the ridiculous political circus that has dominated the media for the last few days, when the focus should have been on Donate Life Week.

Pretty Wall hanging gift from Vic - Gorgeous Crochet Bunting made by Trudi

I want to say a huge thankyou to everyone who emailed, left me a comment, or helped to spread the Donate Life message this week.


As a finale to Donate Life Week, there's a documentary called The Last Race on ABC1 at 6.30 PM tonight.

  • About The Program

  • Coinciding with DonateLife Week, a national week of raising awareness and promotion of organ and tissue donation, this dramatic film tracks a family's heart-wrenching dilemma when their beloved son is declared brain dead after a cycling accident.

    At the hospital, they wrestle with the decision to donate his organs, having never asked him his wishes and never having had the conversation among themselves.

    Meanwhile, in intensive care, a father is watching his teenage daughter with cystic fibrosis struggle to breathe and deteriorate to critical condition. She needs a new set of lungs to survive. Elsewhere in the hospital, a 45-year-old woman also is on the recipient list, where she has waited for two years.

    The cyclist's organs become available, but the doctor must decide whose need is greatest.

    Then the race is on.

    Fewer than one in five Australians has had memorable discussions with their loved ones about their donation wishes.


Sunday Snippets via Tinniegirl

Saturday, February 25, 2012

Saturday Shopping...


It's waaaaay too hot to be doing much at all in Melbourne today, so why not do a little online shopping?


There's still a selection of super gorgeous collaborative iPad Sleeves and Handbags in the Shiny Happy Art Shop.

Have a happy (and hopefully cool) day!

Thursday, February 23, 2012

Toytown Tales


I finally made it into the city yesterday to see the Toytown Tales Exhibition at Outre with Jess and Cathie.

There are lots of gorgeous close-up photos over at Teddy Bears Wednesday, but it's not until you see them in real life, that you have the chance to check out the amazing attention to detail in each creation.

Crappy iPhone photo - sorry!

I have the attention span and patience of a gnat when it comes to most types of crafting, so I really appreciate the hours Jess has taken to achieve this level of detail. Especially with the hair of each of the jointed bears.

Unfortunately the parking restrictions in the city made it impossible for me to hang around for too long. When I arrived back at my car, the car in front and the car behind me both had parking tickets.... but I didn't - hallelujah... and thankyou good karma fairies!

Tuesday, February 21, 2012

Tutorial - Craft Space Tips and Tricks

It's been a little while since I've written a crafty tutorial, so I thought I'd share some of my favourite Craft Space Tips and Tricks.

After a long career in the manufacturing industry where the focus is always on safety, ergonomics, and productivity, my craft space has naturally evolved to include these same elements.

It's taken a few years to get the space to work perfectly for me, but it's worth taking a step backwards, and thinking about what will work for you.


Tip 1 - Desk or Table

This is piece of furniture where I would begin a scheme.

Think about the not only the height and width of your table or desk, but also the depth (how far it will protrude from the wall).

I have overhead cupboards, so I've chosen to have a slimline depth desk so that I can reach above. It also works for the small projects that I make such as pouches and bags and clothes.If you're a quilter, then a slimline depth desk probably isn't going to work for you.

For sewing purposes, I wanted a desk with a shiny laminated top. Not only is it really easy to clean, but fabrics glide across with ease as they move through the sewing machine.
 
On the negative side, this surface scratches really easily so it's not suitable for pinning.


Tip 2 - The Chair

If you're going to spend a lot of time sewing or crafting, then this is probably going to be the most important piece of furniture in the space. Try to think about if from the perspective of a worker who may spend all day at a desk, or at a table in a factory. They use an adjustable ergonomic desk chair for a good reason.

You need to be able to adjust your seat height to suit your table, and you also need to be able to adjust your back rest so that you sit up straight (and try not to hunch over).

I know a vintage wooden chair with a floral cushion looks much more pretty, but I'd rather be comfortable when sewing.

An adjustable desk chair is also very useful when it comes to the ironing board tip.

Tip 3 - Lighting

It's very important to be able to see what you're doing, especially if you like to craft or sew at night.

I don't have very good natural light in my craft space, so I went to the extreme and had a skylight installed, but you can pick up a great adjustable lamp (like the one pictured above) for around $20 from Officeworks.


Tip 4 - The Ironing Board

Most ironing boards are height adjustable.

Adjust the height of your board so that it's the same height as your table, and set it up right next to your sewing table.

As you're sewing, if you need to stop and iron, you don't need to stand up and walk to the ironing board, you simply swivel on your desk chair, iron your fabric, and then swivel back.


Tip 5 - Easy Access

To save time and frustration, keep everything you need easily accessible.

You may not have desk drawers, but think of other ways to keep necessary items close to your workspace so that you don't need to get up and search.

I have all of my threads, bobbins, tools, sewing machine feet, scissors etc. exactly where I need them.


Tip 6 - The Power

One of the things that drives me completely bonkers is that powerpoints are only ever installed right down low along the bottoms of walls, behind the furniture, making them completely inaccessible.

These powerboards with switches are a godsend. I have one sitting on top of the desk so that I can easily plug and unplug all of my appliances such as the iron, laminator, cordless vacuum charger etc.

So much easier than getting on the floor under the desk to access the powerpoint! 


Tip 7 - The Cutting Table 


I'm not sure  whether you can tell from this photo, but there's quite a big difference in height between my sewing desk and my cutting table.

I rotary cut everything standing up, so I've had my cutting table raised (by adding lockable castors) so that it is approximately the standard kitchen bench height of 900mm (of course, this height won't work for everyone as it depends on your own height).

Think about whether you're bending a lot when cutting. Is there a way that you could raise or lower your table so that it's more appropriate for your own height? A good test is to put your cutting mat on your dining table, and then then on your kitchen bench to see what difference it makes for you.


I hope there's a little helpful hint in there somewhere.
If you try something out and like it please let me know!
 

Monday, February 20, 2012

Sunday Snippets... Saturday Road Trippin'


Saturday Morning - Middle of nowhere traffic jam for a CFA controlled burn off.


Saturday Middling - A visit to Red Brick for Blossom and Bloom


Saturday Lunchtime - Baconpalooza at Cafe Muzyka


Saturday Early Arvo - The Crafty Squirrel


Saturday Late Arvo -A detour to visit my sister


Saturday Evening - Back home.... just me and my moon tan.