A little while I ago I received an email with a very interesting proposition.
I was asked whether I'd like to take up the creative challenge of re-fashioning any item of clothing from Boohoo.com
Now, I absolutely love a creative challenge, so of course I jumped at the chance. Anything that gets me thinking outside the creative box is fun!
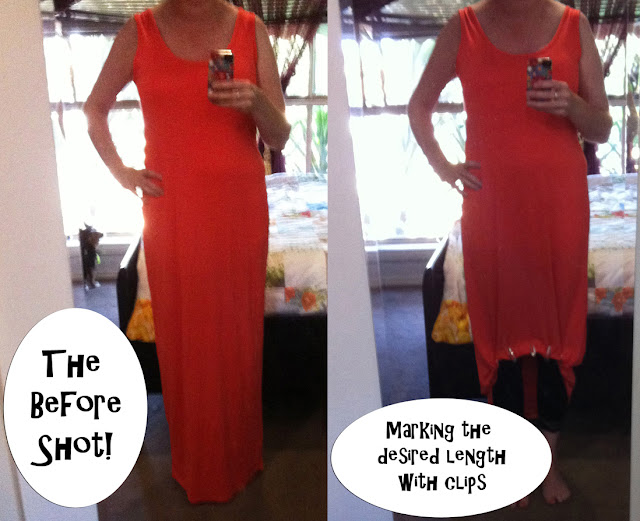
I chose this Sandy Scoop Neck Maxi Dress as there was plenty of scope for refashioning, and I know that orange suits my skin tone.
Please excuse the photo quality - it's the only full length mirror in my house
The first step to shorten the dress using my totally not-technical method.
This is how I determine the hem length on all my dresses - I just put the dress on and then clip up the hem until it's sitting at a length that I think is flattering.
I'm a little bit obsessed with Peter Pan collars since making my Alma blouse, so I decided to add one to the dress.
I simply traced the curve of the neckline of the dress and created a little paper template using graph paper.
I cut two collar templates in fabric, interfaced one of them to add structure, placed them right sides together and sewed along the bottom curved edge. I then trimmed and cut into the curved seams before turning out.
It just so happened that my Linear Design fabric in tangerine colourway matched the dress perfectly!
I placed the collar onto the top of the dress and stitched it into place, before stitching binding over the top to cover the unfinished collar seam.
I'm obsessed with pockets, so there was no way that I could forget them on this refashion!
I simply made myself another paper template in a shape that I thought would be flattering for the style of dress. They're just two pieces of fabric placed right sides together, stitched, trimmed and turned out - easy peasy.
I matched up the straight edge of the pockets with the side seams of the dress, and then simply stitched around the curved section to attach them to the dress.
The final piece of the refashioing puzzle, was to create a pretty belt to cinch in the waist (or for me, to try to create the illusion of a waist)
To create the belt, I used a method very similar to the belt in Nikki's You Sew Girl book
I love the funky red belt buckle that I had in the stash.
I used my 25mm bias tape maker to make some very simple belt loops and hand stitched these to the side seams. I can't stand it when a belt slips around up and down - belt loops are a necessity!
This is just another random photo because I LOVE the collar.
......et voila - here's the finished dress.
It turned out so much better than I'd even hoped. Can't wait to give it a whirl!
Edited: Here's a little snapshot of what it looks like on.... I accidentally cut my head off - it's really hard to do a self-photo shoot!
Disclaimer: This is NOT a sponsored post, but I was given the dress as a gift from Boohoo.com


11 comments:
Make sure you post some pics of you modelling the dress. Looks fab and very you.
oh Yay that is so cool...great challenge. xx
Great job, Cam! Very clever.
Oh my goodness, what a fun challenge! You have done an amazing job, love your fabric!
I'm so impressed with how amazing a dress you've created! It looks fab on you.
Great outcome! That's a much nicer dress than how it started off.
wow..looks great!
It looks great Cam
such a clever clogs! it looks great!
xo
I like that you had matching toenails teehee
I love how you refashioned this by adding your own fabric - which is awesome btw.
Also a great tutorial so I have shared it on the Eddies Room best dress refashion tutorials post. Hope that's ok!
xx Eddie
Eddie's Room on Facebook come over for some crafty ideas and conversation. :-)
Post a Comment