

Fabric - Go Granny II 100% Cotton
Download the PDF You will need:
Fabric
Thread
Sewing Machine
Overlocker (optional)
Wide Elastic
Safety Pin (for threading the elastic)
Step 1. Determine the Size:
I'm choosing to make a size 4 skirt for a friends daughter using the online Childrens Clothing Sizing Guide from the Target Website. It gives me a waist measurement of 54cm.
The length is a little bit of a guesstimate, but I'm aiming for have a finished length of approximately 36cm.
Step 2. Calculate the Fabric Size:

The skirt is just one large rectangle of fabric.
Width: Finished Waist Size x 1.5 = 54 x 1.5 = 81cm
Length: Finished Length + 5 cm = 36 + 5 = 41cm
Step 3. Fabric

Cut the fabric rectangle and overlock all four sides (if you have an overlocker)
Step 4. Hem

On both of the two long sides of the rectangle, fold over a 1cm hem and iron and stitch into place.
Step 5 - Sew into a cylinder:

Fold your fabric in half with right sides together, so that the two short sides are lined up facing each other.
Measure and mark 3 cm from the top, then sew a 1cm seam all the way to the bottom
You should now have a large fabric cylinder.
Step 6 - Press Seams Open

Place the cylinder shape over your ironing board, and press the seam open.
You should have the 3cm gap at the top of your seam.
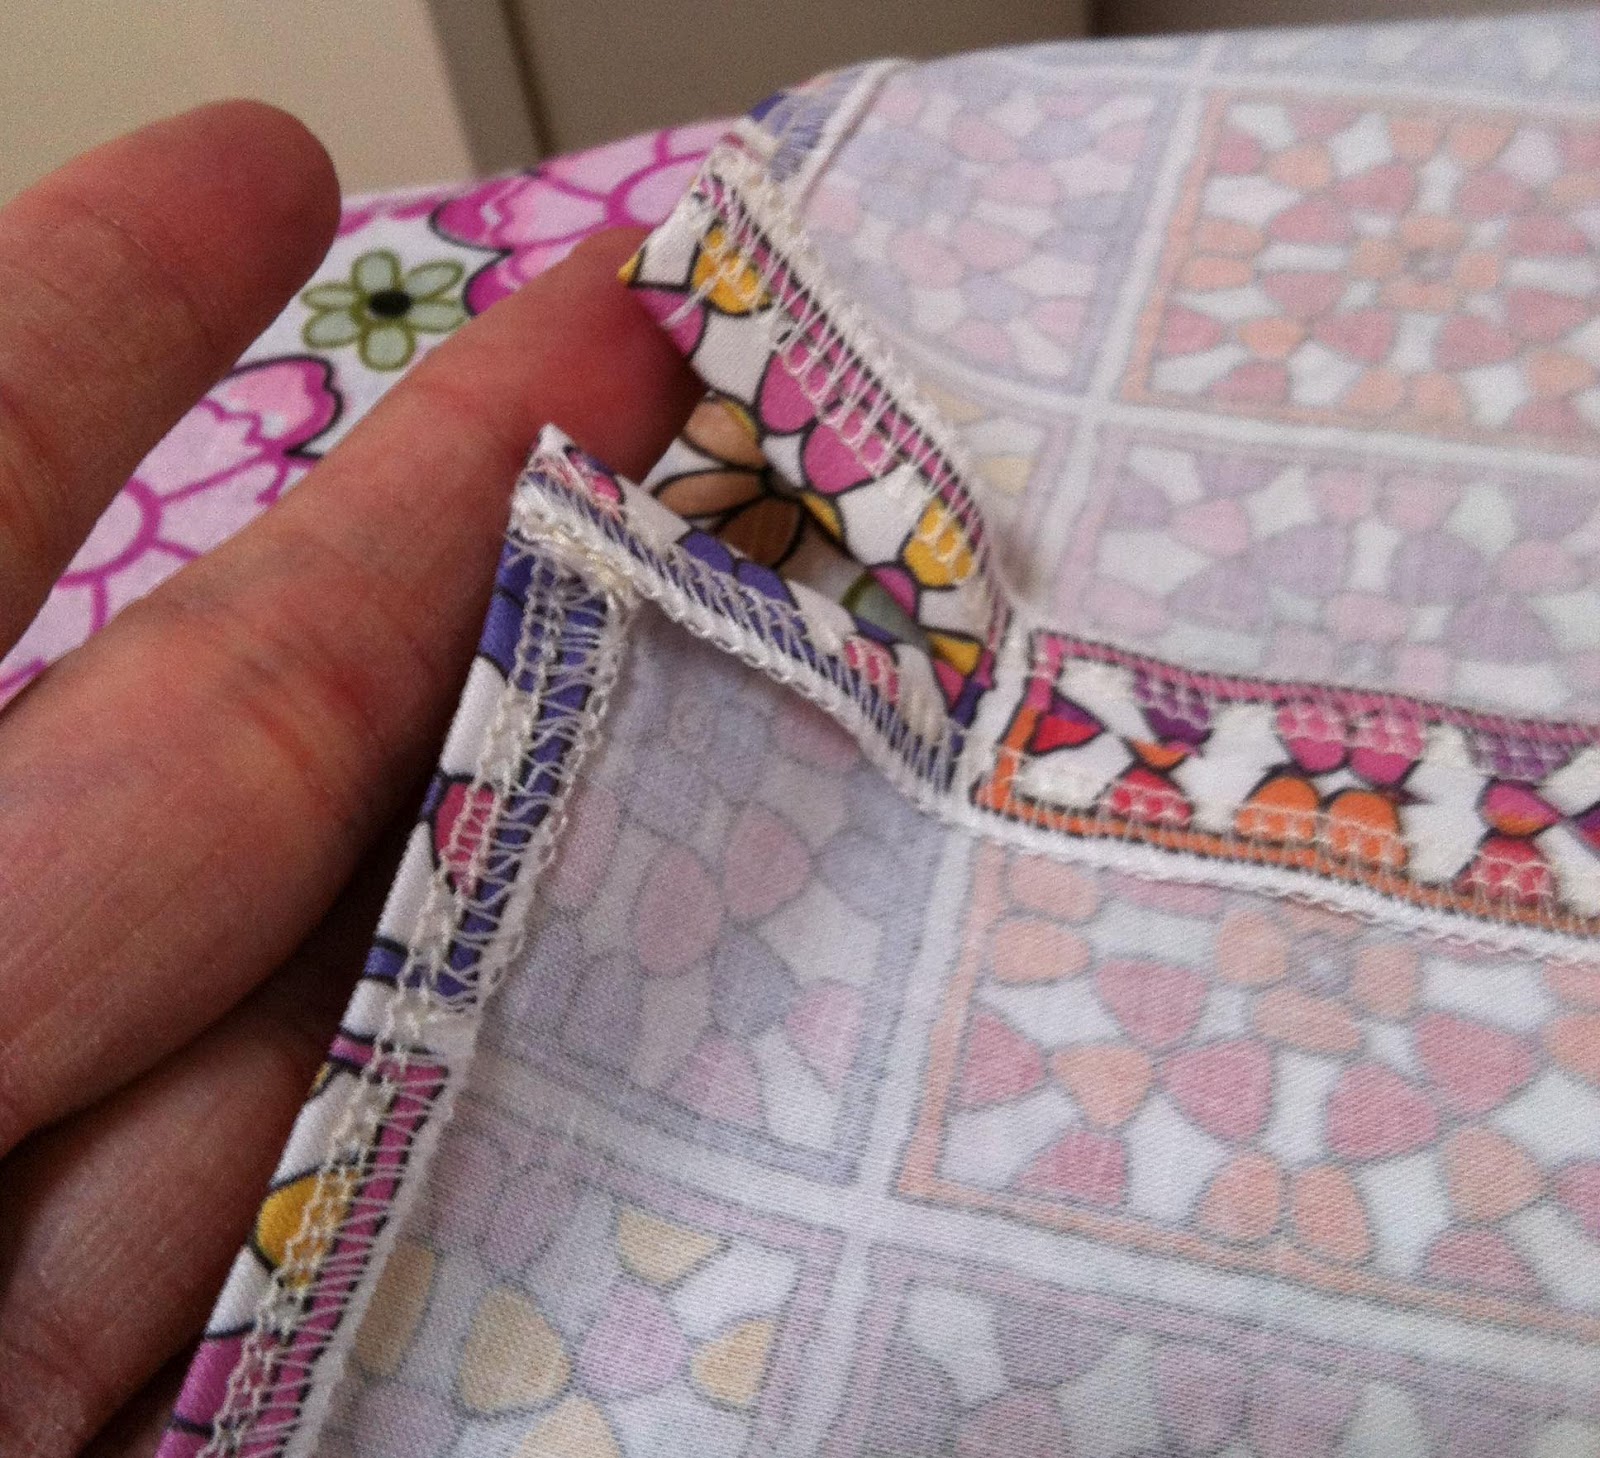
Step 7 - Create the casing for the elastic

At the 3cm mark, fold the fabric over and press into place.

Stitch into place along the same stitching line. You can now see the little gap in the inside seam where you can feed the elastic through at the end.

Check the width of your elastic, and then sew another row of stitching along the top edge of the skirt. This ensures that the elastic stays nice and neat and flat inside the casing.
Step 8 - The Elastic

To determine the length of the elastic - just add 4 cm to the waist measurement.
I've cut the elastic at 54 + 4 = 58cm
Attach a safety pin and feed it through the casing until you have both ends out.

Lay the elastic flat with a 2cm overlap and stitch together securely.
Once stitched, feed back into the casing, spreading it evenly around the elastic.
Stitch the gap closed.
Step 9 - Finishing the bottom.

I've chosen to add binding at the bottom of my skirt, but you can just fold and iron a 1cm seam, and stitch it into place, or even add a little ruffle.

That's it!
Super simple and easy peasy.
If you make one, I'd love it if you added it to my tutorials Flickr Group
8 comments:
Think I just might NEED a serger.
Great color! ! ! ! !
Whimsy at the hemline.
hugs
Gerry
Wow Cam! This is one of the clearest, well written tutorials I've seen online! The pics are fabulous and details show absolutely everything. Love it. I remember a sewing teacher a few years ago drilling it into me: use non-roll elastic. But it's probably all they make nowadays.
oh i love this type of skirt pattern - i whip them up for my daughter and nieces often. i love that fabric!
very cool Cam and super easy, maybe I can even make that!!
♥
Oh cute. I wanted to see your fabric made up in children's clothes.
Brilliant!!!
This is the one item of clothing that I've actually had a go at making. But I wish I had your tutorial when I did it! Will def try again now.XX
This is a great tutorial. Thank you Cam! xox
This is adorable Miss Curlypops! I loooove your material and thanks for sharing your tute too!
Post a Comment